Bath Bomb Birthday Treats for School
Don't make cupcakes again this year! Learn how to make bath bombs for school birthday treats and party favors.
Servings: 5 Bath Bombs
Equipment
- Glass, Ceramic or Metal Mixing Bowl and Spoon
- Tray lined with Grease-Proof Paper
- Cellophane Bags
- Blank Gift Tags
- Printable Sticker Paper
- Ruler and Craft Knife
Ingredients
- 1 cup Baking Soda aka Bi-Carb Soda
- 1/2 cup Citric Acid
- 4 tsp Carrier Oil
- 20 drops Essential Oil
- Soap Coloring
- Bath Bomb Mold
Instructions
- Sift the baking soda and citric acid into a bowl and mix well. Add the carrier oil, essential oils and soap coloring. Use your hands to combine the mixture, rubbing it between your fingers to evenly disperse the wet ingredients. You’ll know your mixture is ready when it sticks together/packs down and can keep its shape. It will still look kind of dry, but if you take a handful of the mixture and squeeze it, it should pack easily into a ball. If your mixture is too dry add a few more drops of carrier oil and mix again.
- Now grab your bath bomb mold and place a couple of spoonfuls of mixture in it. Push the mixture down firmly to cover the bottom of the mold as this will ensure your mixture is compacted well. Continue to fill your mold, pushing down the mixture and compacting it into place. Compaction is an important step as it may mean the difference between hard or crumbly ‘bombs’ once they are dry.
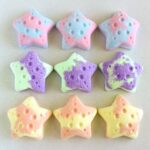
- Starting at the top left and working in rows, turn your bath bombs out on to your paper-lined tray. Keep filling your mold and turning it out until you have used all of your bath bomb mixture.
- Set your bath bombs aside to air dry in a cool, dry place for 24-72 hours.
- While your bath bombs are drying, create some labels for your bath bombs using your favorite word processing/publishing program. Be sure to include an ingredients list, directions for use, and a 'DO NOT EAT' notification.
- Print your labels on to printable sticker paper. Use a ruler and a craft knife to cut up your labels and stick them onto blank gift tags.
- Once your bath bombs are dry, place individually into cellophane bags. Tie up/seal each bag and attach a tag.
- Take your bath bombs to school and hand them out to your child's classmates to celebrate their birthday.
Notes
Wearing gloves is recommended.