
I’ve always been a fan of the ombre soap creations found on Pinterest and Instagram. They are so colourful and you can really make some truly stunning designs.
This post contains affiliate links. If you buy something through one of those links, I will receive a small commission at no extra cost to you. As an Amazon Associate I earn from qualifying purchases.
Thank you for supporting my site!
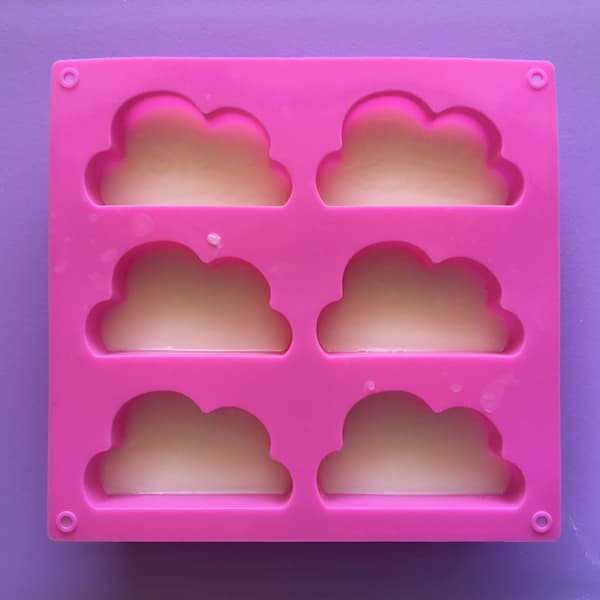
Recently I picked up this cloud silicone mould for a special project I’m working on and it inspired me to create my very own ombre soap project.
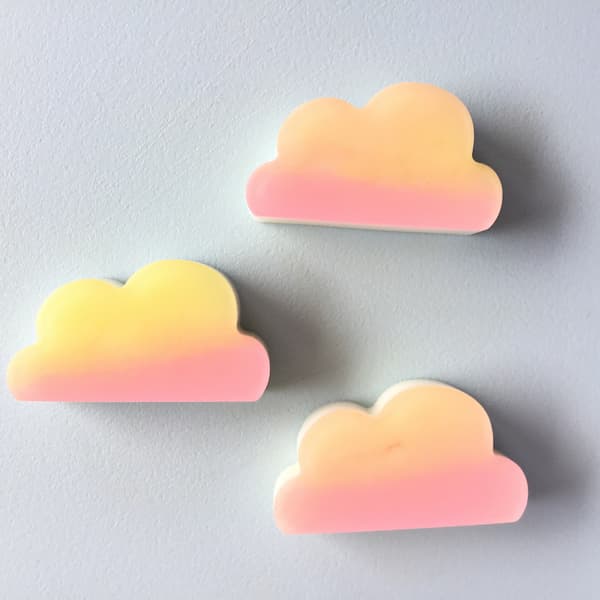
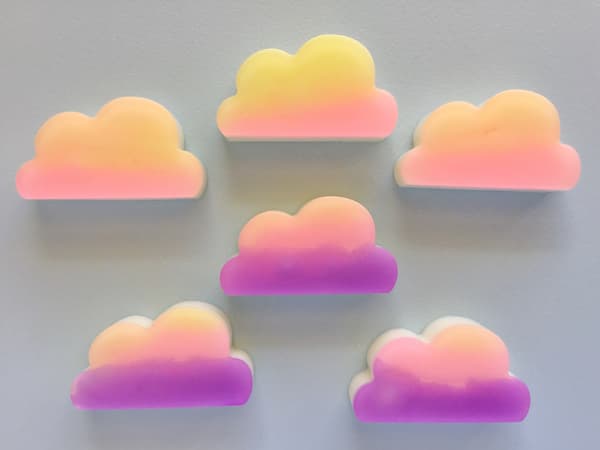
Take a look at my Sunset Soap Bars 😍😍😍.
Related
How to Make Super Thin Single-Use Soap
Perfect Essential Oil Soap Scents
Where to Buy Cute and Affordable Soap Moulds
What is Ombre Soap?
Ombre (from the French meaning ‘shaded’) refers to having colours or tones that shade into each other. There is a graduation from light to dark or colour to colour. Ombre soap is soap that does just that, starts as one colour and gradually changes into another.
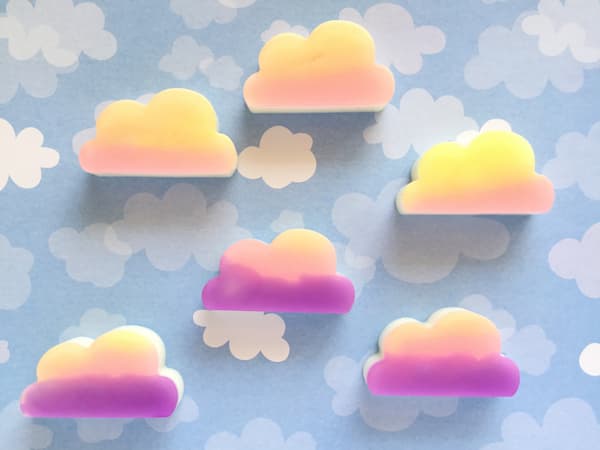
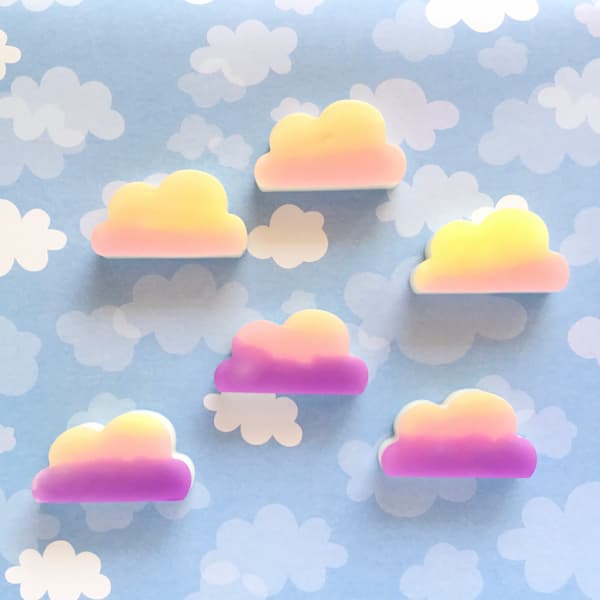
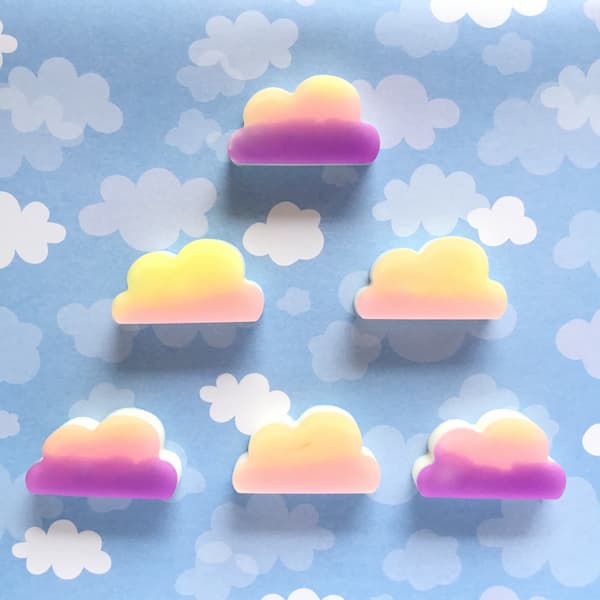
My sunset soap bars, for example, change from purple to pink to orange or, from pink to orange to yellow.
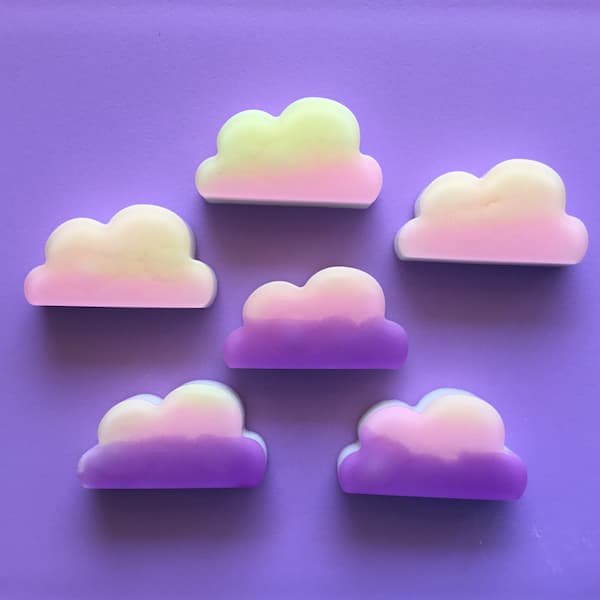
The result is a spectacular sunset effect.
I’d love to share with you how I made them. Let’s get started.
What You Need to Make Sunset Soap Bars
Melt and Pour Soap
Melt and pour soap is sold as large blocks that you can cut up and then weigh out the amount of soap you need. You will need two types of melt and pour soap base to make sunset soap, a clear base and a white base.
For this project, I used 50g of clear melt and pour soap base and 190g of white melt and pour soap base to make 6 bars of soap that weigh approximately 30g each. The quantities listed above includes ~5% wastage.
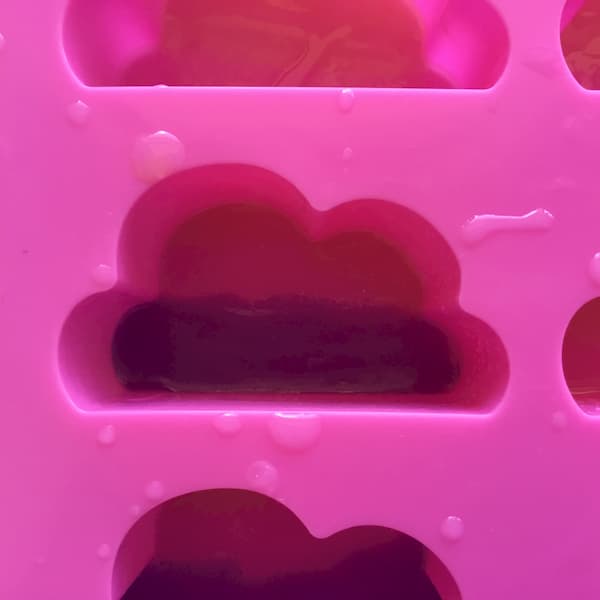
Cloud Mould
What makes these soap bars truly reflective of a sunset is this cute little cloud-shaped mould. I only filled the mould cavities part of the way to make 30g guest soap size bars, but you can fill yours to the top if you would like a larger soap bar.
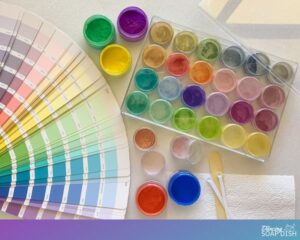
Soap Colouring
Very bright or neon-coloured soap colouring will yield you the best results for your sunset soap bars. A single drop of soap colouring was all I needed to subtly tint the clear soap base. Less is more for this project as you want the colours to blend together where they overlap for a beautiful ombre effect.
The strength of soap colourings can vary depending on which brand you choose. If one drop of colouring is too dark for 10g of soap, dip a toothpick in your colouring and swirl that through your soap instead.
Essential Oils
Choosing a bespoke scent for your sunset soap bars needn’t be hard. I love scenting my melt and pour soap projects with a range of essential oil blends.
For this project, I used a blend of Lavender and Tangerine essential oils at a ratio of 1:2, but you can feel free to use your favourite combination of essential oils. If you are looking for ideas, check out my list of perfect essential oil soap scents.
Small Glass Beaker
When attempting a project that requires only small amounts of soap base to be melted, it’s important to have the proper tools. I don’t recommend trying to melt 10g of soap base in a 500ml or 16oz jug. The soap will be spread too thin and will probably set before you are able to pour it, or even worse, burn. You can melt larger quantities to avoid this, but it will end up going to waste.
So you will need to find a smaller vessel, for example a small sauce dish or pinch bowl, or ideally, a 50ml or 100ml glass beaker.
A small glass beaker allows you to melt small amounts of soap base without a large amount of wastage, plus beakers have a pouring spout which will give you more control over your pour than any small vessel without a spout.
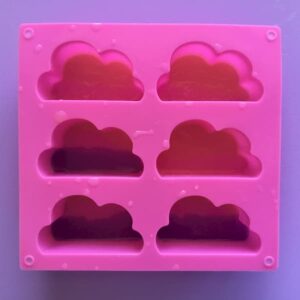
Rubbing Alcohol or Vodka in a Small Spray Bottle
Spraying your cloud mould with alcohol before you pour your soap will help it to spread quickly to the edges of the mould and not just sit in a big blob. Spraying the mould again once the soap is poured will also remove any bubbles sitting on the soap’s surface.
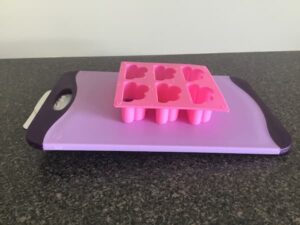
An Angled Ramp
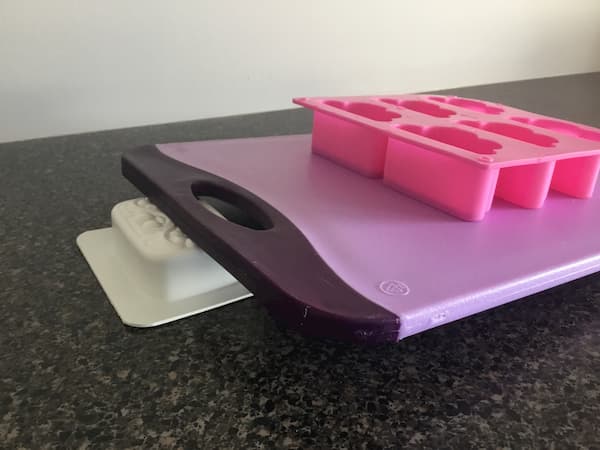
You will need to construct an angled ramp to rest your cloud mould on when pouring your soap. This is to ensure your soap remains isolated to one area of the cloud cavity and doesn’t spread across the whole surface of the mould.
A plastic cutting board and a book are perfect for making an angled ramp. As you can see from the image below I used a cutting board and an old soap mould.
Aim to have your ramp elevated no higher than 1” (2.5cm).

Additional Items Required
Kitchen Scales – I’ve used grams in this recipe because the amounts are easier to manage compared with ounces. Most kitchen scales these days are interchangeable between grams and ounces. Check your scale’s instruction booklet for how to change you scale to measure in grams and then change it back when finished.
Glass Measuring Jug – You will need a larger (500ml/16oz) measuring jug to melt the white melt and pour soap base. I have a separate glass measuring jug dedicated to essential oil DIY (soap making, lotion bars, lip balm etc) to avoid any cross-contamination of non-ingestible ingredients with food. I recommend you do the same.
Metal or Bamboo Skewer – Skewers are super handy for stirring and can be easily cleaned or disposed of. A wooden popsicle stick will also suffice.
Paper Towel – Make sure you have some paper towel on hand for cleaning up (there may be drips) and for resting your skewers on after stirring.
Important Recipe Notes
Pour Diagram
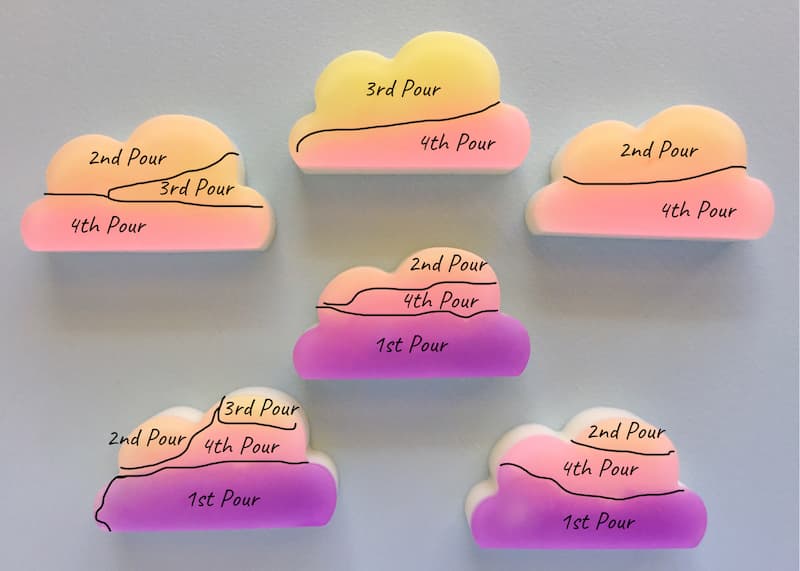
For this Sunset Soap Bars project, I used 50g of clear melt and pour soap base divided into four different colours: 10g x purple, 10g x orange, 10g x yellow and 20g x pink. I used these four colours to create a thin ombre layer of soap and then I poured another 30g of white soap base on top in each cavity (6 x 30g = 180g + 10g wastage = 190g).
For the ombre layer of soap I used an angled ramp in order to fill only the very top or the very bottom of the cloud cavities with purple, orange and yellow soap, then I laid the mould flat and poured the pink over the top.
Completing the ombre layer of soap required four separate soap pours as illustrated by the Pour Diagram below. You can use this pour diagram as a reference when making your soap or you can use your own random combination of colours.
Each soap pour involves the following steps:
- Melting a small amount of soap
- Tinting it to the appropriate colour
- Positioning the mould at the appropriate angle
- Pouring the soap into the mould
- Allowing time for your soap to set
The Final Pour
The final (5th) pour is the white soap base on top of the ombre layer. The essential oils are added at this stage to scent the soap.
It’s important to be aware that the heat from the final pour has the ability to remelt the ombre soap layer. This could distort the colours or even cause the white soap to bleed through the ombre layer.
This is more likely to happen if the soap is poured from a great height or concentrated in a certain area. To avoid this, when pouring your final layer, bring the spout of your jug way down to the edge of the mould cavity and pour the soap down the side of the cavity. This way the soap will make contact with the side of the cavity first and then flow down over the ombre layer, reducing the risk of concentrated heat melting the ombre layer.
Cleaning Up
Wipe any excess soap out of your glass measuring jug with a paper towel. Then soak your measuring jug in water for ten minutes before rinsing it out and wiping it dry with another paper towel.
Printable Tutorial for Sunset Soap Bars
Lavender and Tangerine Sunset Soap Bars
Equipment
- Small Glass Beaker (25-100ml)
- An Angled Ramp (Book + Cutting Board)
- Alcohol in a Small Spray Bottle
- Kitchen Scales
- Glass Measuring Jug
- Bamboo or Metal Skewer
- Paper Towel
Ingredients
- 50 g Clear Melt and Pour Soap Base
- 190 g White Melt and Pour Soap Base
- 4 colors Soap Colouring Purple, Pink, Orange, Yellow
- 20 drops Lavender Essential Oil
- 40 drops Tangerine Essential Oil
- 1 Cloud Silicone Mould
Instructions
- Assemble an angled ramp out of a cutting board and a book no more than 1” (2.5cm) in height.
- Use a set of kitchen scales to measure out 50g of clear melt and pour soap base. Cut up the soap base into small cubes for easy melting.
1st Pour
- Weigh out 10g of clear melt and pour soap base into a small glass beaker. Melt in the microwave in short bursts of 10 seconds, stirring well in between (watch it carefully, don’t let it boil!).
- Add 1 drop of purple soap colouring and stir well until combined and you have an even colour. If your soap mixture has lots of bubbles in it, spray the surface with alcohol.
- Place the cloud mould on the angled ramp with the bottom of the cloud shapes angled down so that when soap is poured into the mould it will pool at the base of each cloud.
- Spray the base of three of the cloud cavities with alcohol, then very carefully pour a small amount of soap mixture into each of the three cavities (refer to the ‘1stPour’ on the Pour Diagram). Immediately spray the soap with alcohol, doing so will help your soap spread out to the edges of the cavity and remove any surface bubbles. Discard any remaining soap.

- Leave your 1st Pour to set for at least ten minutes. Clean and dry your small beaker to use for the next pour while you wait.
2nd Pour
- Weigh out 10g of clear melt and pour soap base into a small glass beaker. Melt in the microwave in short bursts of 10 seconds, stirring well in between (watch it carefully, don’t let it boil!).
- Add1 drop of orange soap colouring and stir well until combined and you have an even colour. If your soap mixture has lots of bubbles in it, spray the surface with alcohol.
- Ensure your 1st pour has set, then turn the cloud mould around so the top of the cloud shapes are angled down so that when soap is poured into the mould it will pool at the top of each cloud.
- Spray the base of each of the cloud cavities with alcohol, then very carefully pour a small amount of soap mixture into each applicable cavity (refer to the ‘2ndPour’ on the Pour Diagram).Immediately spray the soap with alcohol, doing so will help your soap spread out to the edges of the cavity and remove any surface bubbles. Discard any remaining soap.
- Leave your 2nd Pour to set for at least ten minutes. Clean and dry your small beaker to use for the next pour while you wait.
3rd Pour
- Weigh out 10g of clear melt and pour soap base into a small glass beaker. Melt in the microwave in short bursts of 10 seconds, stirring well in between (watch it carefully, don’t let it boil!).
- Add 1 drop of yellow soap colouring and stir well until combined and you have an even colour. If your soap mixture has lots of bubbles in it, spray the surface with alcohol.
- Leave your soap mould on the ramp in the exact same position you used for the 2nd Pour.
- If the alcohol has dried, respray the base of each of the cloud cavities with alcohol, then very carefully pour a small amount of soap mixture into each applicable cavity (refer to the ‘3rd Pour’ on the Pour Diagram).Immediately spray the soap with alcohol, doing so will help your soap spread out to the edges of the cavity and remove any surface bubbles. Discard any remaining soap.
- Leave your 3rd Pour to set for at least ten minutes. Clean and dry your small beaker to use for the next pour while you wait.
4th Pour
- Add the remaining (~20g) clear melt and pour soap base into a small glass beaker. Melt in the microwave in short bursts of 10 seconds, stirring well in between (watch it carefully, don’t let it boil!).
- Add 1-2 drops of pink soap colouring and stir well until combined and you have an even colour. If your soap mixture has lots of bubbles in it, spray the surface with alcohol.
- Ensure the previous 3 pours have set and then remove the book from the ramp so the cloud mould on the cutting board is sitting on a flat surface.
- Spray the base of each of the cloud cavities with alcohol, then very carefully pour the soap mixture into each cavity, filling in any remaining gaps between the colours that have already been poured. Pour enough soap in so the pink overlaps part way with the other colours and doesn’t just butt up against them. This will give you a prettier ombre effect. Spray the soap with alcohol to remove any surface bubbles. Discard any remaining soap.
- Set your ombre layer of soap aside to set for at least an hour.
Final (5th) Pour
- Ensure your ombre layer of soap has set. Remove any stray drops of coloured soap from the edges of your cloud mould cavities.
- Measure out 190g of white melt and pour soap base. Cut up your soap into small cubes and put it in a 16oz/500ml glass jug.Melt in the microwave in short bursts of 30 seconds, stirring well in between (watch it carefully, don’t let it boil!).
- Add the Lavender and Tangerine essential oils and stir well until combined. If your soap mixture has lots of bubbles in it, spray the surface with alcohol.
- Put the cutting board (with the mould on top) onto a set of kitchen scales and spray the ombre layer of each cavity liberally with alcohol (this will help the ombre and white layers stick together).
- Tare your kitchen scales and then carefully pour out 30g of soap down the edge of each cavity into the mould (refer to ‘The Final Pour’ under ‘Important Recipe Notes’ in the main blog text). Repeat until 30g of soap has been poured into each cavity (it doesn’t matter if you accidentally go a couple of grams over, that’s what the wastage is for). Spray the surface of the soap with alcohol to remove any bubbles.
- Set your soap aside to set overnight.
Demolding the Soap
- When your soap has set, pop each sunset soap bar out of the silicone mould.
Cleaning Up
Wipe any excess soap out of your glass measuring jug with a paper towel. Then soak your measuring jug in water for ten minutes before rinsing it out and wiping it dry with another paper towel. Now you can hand wash it or put it in the dishwasher as per normal.
Enjoy!

